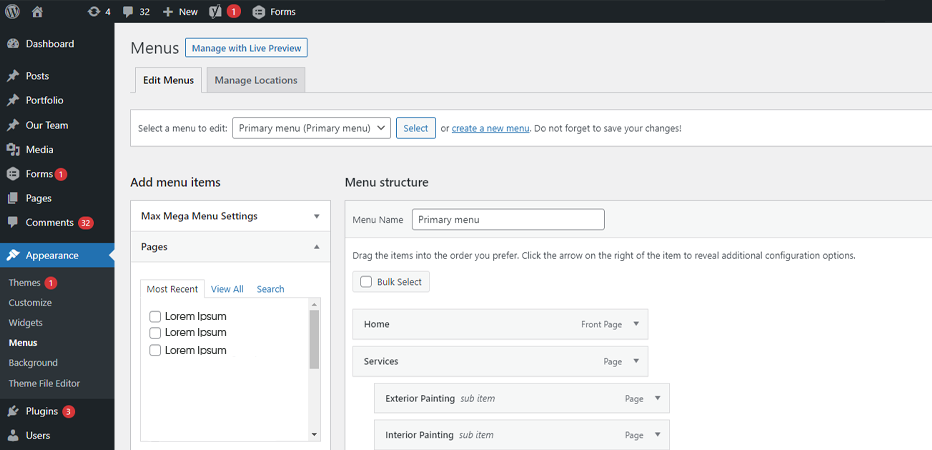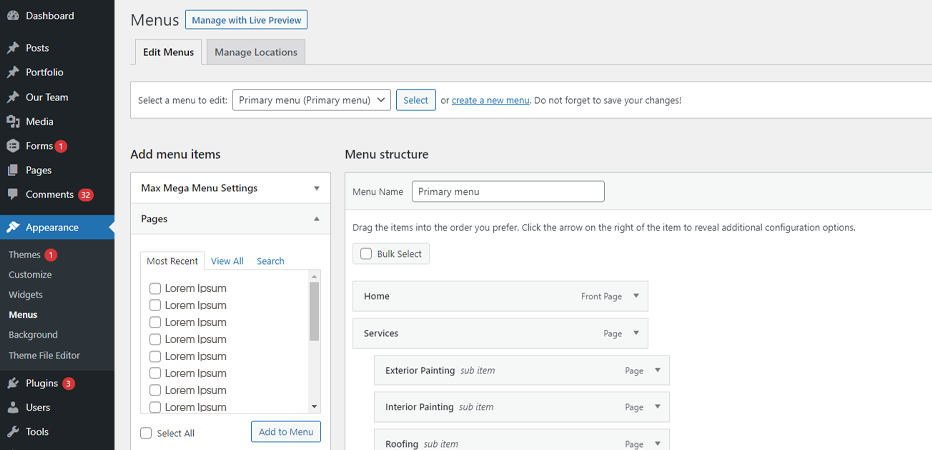
The performance of any business website depends on its simplified navigation. After all, users will become frustrated if they fail to discover the menu that directs them on the appropriate path. As a result, users leave the website. The wp_nav_menu function allows easy modification of menus to meet the website requirements and visitor choices. Many WordPress themes provide navigation menus in addition to other components. It contains add-ons, templates, and fonts. However, this menu in no way compromises the look or feel of the website or the brand. This way, incorporating the WordPress navigation menu can be the ideal way to achieve the responsive menu design, website performance, and user experience you expect. Let us now take you to the guide which includes the overview of wp_nav_menu and the steps to add menus to WordPress. The WordPress navigation menu is a function that enables the development experts to build customized menu links on the web pages. Therefore, making it straightforward for visitors to browse the web pages and other information. Use the function.php file to integrate it into the code. Also, it can be modified for typical operational and visual elements. This navigation menu when developed and positioned properly can help simplify the site, make the visitor stay longer on pages, and let users easily discover the content they are looking for. WordPress makes it quite easy to add menus and subcategories. Also, you can link these categories to other web pages, topics, or blog posts. You must follow a set of instructions to create a navigation menu. 1: Open the WordPress admin dashboard. 2: Click on the Appearance option on the left side and open the Menu Page in the sub-category. 3: Now, in the Menu Structure Table, type the menu name. For example, enter “Best Navigation Menu.” 4: Once done, click on the “Create Menu” option. 5: Next, select the pages you want to include in the menu. Under the Menu Settings Table, either you can tick the option “automatically add new top-level pages to this menu”, or can mark certain pages from the column on the left. 6: Click on the “View All” option on the left to view all the website’s pages. Afterward, tick marks the boxes against the pages you want to add to your menu. 7: Enter the “Add Menu” option. Once you have finished adding the pages, you can simply drag & drop them in the desired location. Finally, enter the “Save Menu” option. Also known as nested menus, drop-down menus are navigation menus that comprise parent and child items. All of the child items will appear under the parent item as a submenu when your cursor is over it. Drag an item underneath the parent item and shift it slightly to the right to create a submenu. Additionally, you can create as many layers of submenus to create submenus of submenus. We all know WordPress is a content management system that helps businesses to build and maintain a website. You should add a blog category as a drop-down option to the Navigation menu if you plan to use this CMS to host a blog. Follow these steps below: Step 1: On the menu screen’s left side, click on the “Categories Tab.” Now, under the “View All” tab, view the categories and select the ones you want to add. Step 2: Click on the “Add to Menu” option. The categories will display at the menu bottom as common menu items. Now, you can simply drag and place them as the representation needs. WordPress makes it simple to add unique links to the navigation menu in addition to the pages, categories, and subcategories. Simply put, you can link to other websites you own or your social network accounts using the menu. Step 1: The ‘Custom Links’ tab on the Menu screen must be used. Step 2: Click the “Add to Menu” button once you are done adding the link and the text you wish to utilize in your menu. Additionally, you can increase conversions by including social media icons in the menu or any CTA. You need not stick to the theme’s display location. The navigation menu can also be added using widgets from the footer or sidebar of your WordPress website. For this, Of course, not adding a navigation menu to your website simply makes your business lose clientele. Hence, before you launch or promote it, make it functional so users can navigate and use it. Consequently, they remain longer, explore what they are looking for, and become repeat customers. A navigation menu is also necessary for the site to rank effectively on the SERPs. In simple terms, don’t panic whenever your template themes fail to work. You have multiple options. Simply follow all the above steps and modify your WordPress navigation menu for optimal flexibility. After all, menus are essential. At Awebstar, we design a responsive WordPress website that adapts different device viewports and browsers without influencing the menu layout and content. Our expert WordPress developers develop a website that is easy to navigate and delivers the information that users expect. 
Overview of WordPress Navigation Menu
How to Implement WordPress Navigation Menu on Your Website?
Creating Navigation Menu for Your WordPress Website

Build Drop-Down Menus
Adding Multiple Categories to WordPress Navigation Menu

Adding Custom Links to WP_NAV_MENU
Add WordPress Menu to Footer and Sidebars
The Bottom Line


